
Delivery & Automation · Source-led
Moon Sweepers Automation: Build and Compare Complete Setups
Quick answer
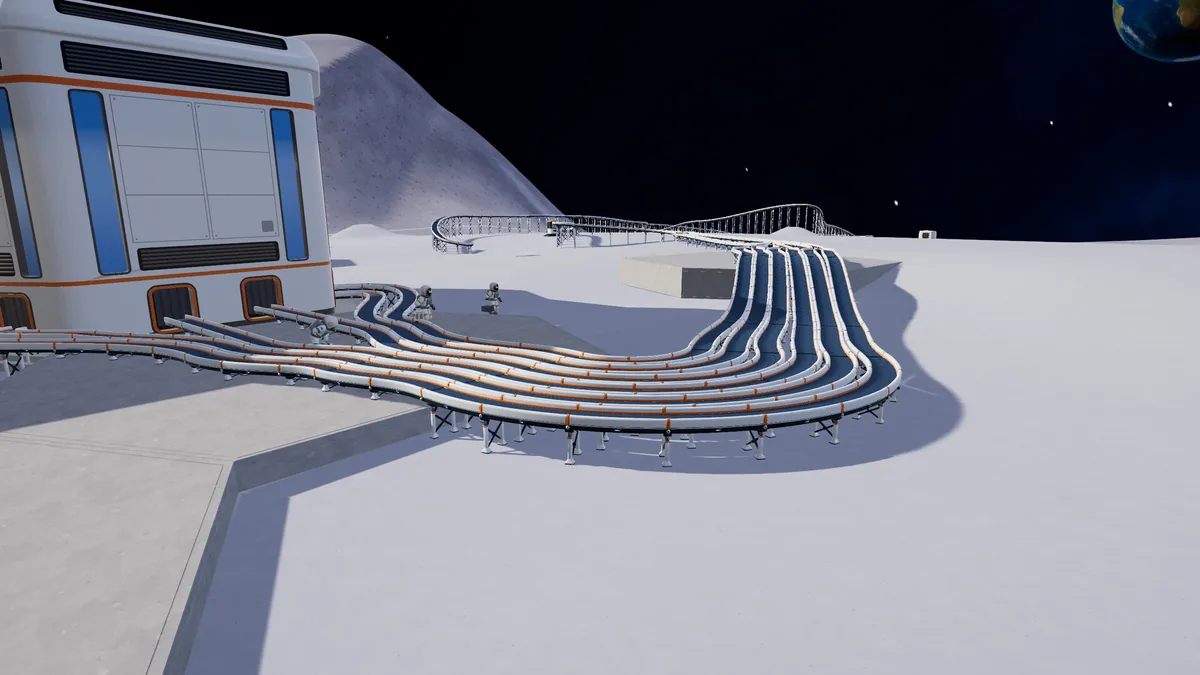
A complete early line is Packager → belt → station. A higher-value line is Packager → pressure chamber → stone press → station, with solar power in range. For automatic cleaning, add robot vacuums or J.O.O.N.A.S. + Capsule Catcher. The chain works only when power, inputs, belts and the receiving station are all available.
Stages
The automation stages
| Stage | Build | Manual work left | Best next upgrade |
|---|---|---|---|
| Hands only | Tool, container, station. | Every sweep and delivery. | Wider tool or container level. |
| Portable drop-off | Packager ($100) + belt to a station. | Carry dust to the Packager. | Longer belt or second Packager. |
| Processing | Pressure chamber ($500) + Stone Press ($1,000) + power. | Build, power and clear jams. | More power and a second press. |
| Local robots | Robot vacuum Mk I/II. | Refuel and clear dock output. | Capsule catcher or J.O.O.N.A.S. |
| Endgame sweep | J.O.O.N.A.S. ($20,000) + Capsule Catcher ($1,500). | Place, power downstream, maintain the line. | Processing capacity and more catchers. |
Layout
A complete dust-to-money layout
This layout starts with hand-carried dust and grows into a powered chain. Build it in order; a missing link is easier to see in a short line than in a fully decorated base.
- 01
Place a Packager at the work site
The Packager costs $100, sits in Logistics and holds 100 kg. Load it by hand; its one output releases 1 kg dust capsules every 0.35 seconds.
- 02
Run a belt to a station or a processing machine
Belts cost $0.50 per metre. A belt ending at a station intake sells cargo as it arrives. Build the belt slightly higher where terrain or equipment would block it.
- 03
Add the pressure chamber
The $500 chamber needs 10 kW and has one input and one output. It presses up to 5 kg of dust into sand every 12 seconds. At full power, that is 25 kg per minute.
- 04
Add the stone press
The $1,000 press needs 18 kW and two inputs: 1 kg dust and 1 kg sand. It makes a 2 kg stone block every 6 seconds, or 10 blocks per minute at full power. One chamber can feed 2.5 presses at full rate.
- 05
Power the machines
A Solar Tracker (L) costs $300, gives 16 kW in full sun, stores 10 kWh and reaches 34 m. A pressure chamber needs 10 kW; a stone press needs 18 kW. Two trackers are the conservative field rule for a pressure chamber; three for a stone press.
- 06
Add cleaning robots only when the line can accept their dust
Robot vacuum docks make 1 kg capsules. J.O.O.N.A.S. fires 20 kg capsules at the nearest catcher. A Catcher with no belt pays at the station; with a belt it feeds 1 kg capsules into the line.
Comparison
Compare three layouts
| Layout | Build cost | Manual attention | Output | Best for |
|---|---|---|---|---|
| Packager → station | $100 + belts | Load the Packager; clear the belt. | Dust at $1/kg. | First automation; cheap and quick to fix. |
| Packager → pressure → station | $600 + power + belts | Load dust; keep power and output clear. | Sand at $3/kg. | Early value increase without a second machine. |
| Packager → pressure → stone press → station | $1,600 + power + belts | Two inputs, power and a longer belt. | Stone at $7/kg. | Stable mid-game factory. |
| J.O.O.N.A.S. → catcher → station | $21,500 + catcher path | Build the robot and catcher; maintain the catcher. | Dust, no hand collection. | Endgame passive cleaning. |
Build costs exclude belts, power and foundations. A $1,500 machine pair can be useless if it has no 10–18 kW supply.
The cheapest automation is not always the most profitable. A Packager-to-station line turns hand-carried dust into automatic sales, but it still needs you to load the Packager. A processing line pays more per kilogram but adds power, input and belt failure points. The money guide compares the values.
Bottlenecks
Where a working line usually stops
| Limit | Number | Symptom | Fix |
|---|---|---|---|
| Belt | 88 capsules / minute | A growing queue or full upstream machine. | Split the line, use a second belt or slow the source. |
| Machine output | One unit every 0.35 s | The belt cannot take the burst. | Do not add a faster machine before the belt can carry it. |
| Pressure chamber | 25 kg / minute at full power | Stone press is starved of sand. | Add a chamber or reduce the number of presses. |
| Stone press | 10 blocks / minute | Stone backs up and the press stops. | Add a station line or more receiving capacity. |
| Power | Stops below 8% | The machine stalls at night or under load. | Add a tracker battery or reduce the number of machines. |
| Robot | Bin full | The robot waits or returns home. | Add a catcher, clear the dock or extend the belt. |
Recovery
Recover after a power or transport interruption
- Stop adding new machines. Check the powered machine first; a belt full of cargo is a symptom, not always the cause.
- Open the machine or robot panel and look for a full bin, no power, a blocked output or a missing input.
- Clear the receiving end before restarting the source. Empty a full station tray, catcher or hopper.
- If the line stopped at night, check the solar battery and the machine's 8% cutoff.
- If a belt is blocked, remove only the blocked segment or reroute it. The 75% refund applies to the removed piece.
- After the line is moving, restart machines one at a time so the next blockage is obvious.
Patch 1.0.4 fixed machines pausing with “Could not pack a capsule” even when power and materials were available. If you are on 1.0.4 and the machine still stops, look for a real input, output or power shortage before assuming the old bug.
Straight answers
Questions about this task
What is the simplest automation in Moon Sweepers?
A $100 Packager with a belt to a station. Load the Packager by hand; it packs the dust into 1 kg capsules, and the station sells them as they arrive.
Is there one best automation layout?
No. The best layout depends on whether you need cheap early selling, higher-value processing or unattended cleaning. Use the layout comparison and the bottleneck table; a copy of someone else's base can fail on your power or travel distance.
Why does my factory stop?
Check power first: machines stop below 8% of their requirement. Then check inputs, output belts and receiving capacity. Robots add their own bin and catcher limits.
Trace the answer
Sources and scope
This is an independent, source-led guide, not a first-hand playtest. Gameplay values, build-menu details and UI behavior are checked against the 1.0.4 data snapshot and official patch notes. Your installed build is the final authority.
- Reference Wikily: Machines and ports Moon Sweepers 1.0.4 data index, checked 28 Oct 2026. Useful for build-menu values; not an official developer page.
- Reference Wikily: Production chains Moon Sweepers 1.0.4 data index, checked 28 Oct 2026. Useful for build-menu values; not an official developer page.
- Reference Wikily: Packager Moon Sweepers 1.0.4 data index, checked 28 Oct 2026. Useful for build-menu values; not an official developer page.
- Reference Wikily: Pressure chamber Moon Sweepers 1.0.4 data index, checked 28 Oct 2026. Useful for build-menu values; not an official developer page.
- Reference Wikily: Stone press Moon Sweepers 1.0.4 data index, checked 28 Oct 2026. Useful for build-menu values; not an official developer page.
- Reference Wikily: Solar tracker Moon Sweepers 1.0.4 data index, checked 28 Oct 2026. Useful for build-menu values; not an official developer page.
- Reference Wikily: Robots Moon Sweepers 1.0.4 data index, checked 28 Oct 2026. Useful for build-menu values; not an official developer page.
- Official Moon Sweepers 1.0.4 patch notes Official patch notes, 25 Oct 2026.